

- Start Here If You’re New To Switcher
- What Switcher Studio Is Built To Do
- Account Setup
- Your First Workflow Walkthrough
In this guide
Start Here If You’re New To Switcher :
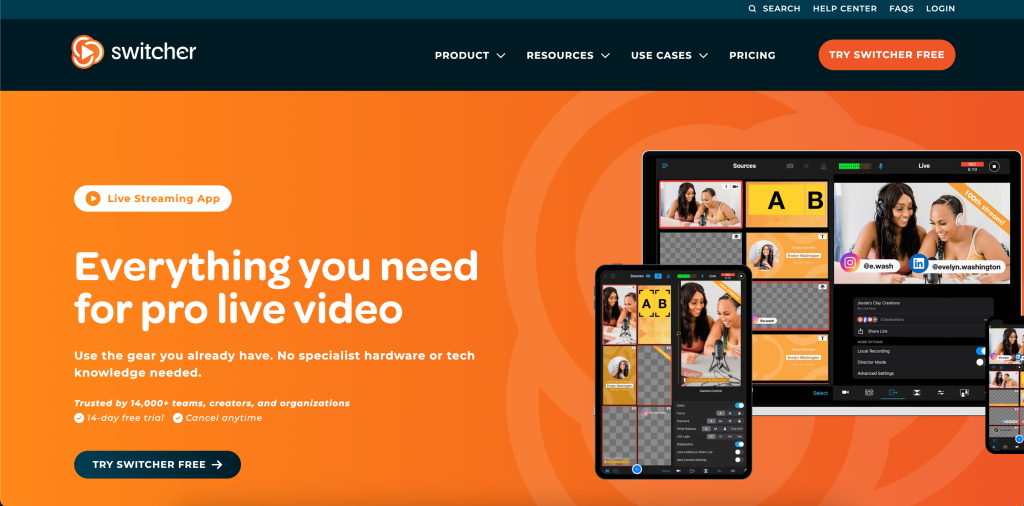
Switcher Studio can look like “just another live streaming app” until you spend a few minutes on the official product pages. Then the real picture shows up. Switcher is positioned as a live video platform for creating, sharing, hosting, and monetizing video, with Mac and iOS support, multicamera production, multistreaming, graphics, remote guests, video hosting, and monetization tools all living in the same ecosystem.
Disclosure: Stack99 earns a commission if you buy through links on this page. It costs you nothing extra and never changes our assessment.
That sounds like a lot, which is exactly why beginners need a calm starting point.
This guide is for the first-time user who wants to understand what Switcher actually does, how to set it up without overcomplicating the process, and how to run a first real workflow that makes sense.
If you want to inspect the product while you read, start with Switcher Studio here.
What Switcher Studio Is Built To Do :
The official site breaks the platform into four big jobs:
- Create.
- Share.
- Host.
- Monetize.
That structure is useful for beginners because it keeps the platform from feeling random.
Switcher helps you create professional-looking live or recorded video using gear you may already have, especially iPhones and iPads. It also lets you stream to platforms like Facebook, YouTube, Twitch, your own website, or other destinations through Custom RTMP. Beyond that, it adds hosting features like video catalogs, watch pages, storage, and analytics, plus monetization options like memberships, event access, and Shopify-powered live selling.
For a beginner, the key point is simple:
You do not need to use every part of the platform on day one.
Account Setup :
The easiest official starting point is the 14-day free trial, which the pricing and homepage materials both highlight.
That is the right way to test Switcher because live video tools are hard to judge from screenshots alone. You need one real stream, one real setup, and one real destination to know whether the workflow feels comfortable.
For a beginner setup, I would keep the first account path simple:
- Start the free trial.
- Choose the device setup you are actually going to use first.
- Pick one primary streaming destination.
- Ignore advanced monetization or hosting features until the first stream works.
That last point matters. A lot of first-time users make the mistake of trying to build the perfect video business in the first hour. The better move is to get one clean stream working.
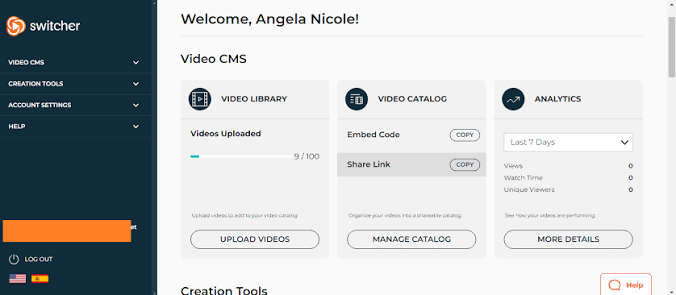
Dashboard Overview :
Once you understand the product sections, the dashboard makes more sense.
At a high level, Switcher is organizing a beginner around a few core actions:
- Set up cameras or sources.
- Choose graphics or layouts.
- Pick a streaming destination.
- Record or stream.
- Save and reuse content later.
The official site is especially strong on a few beginner-friendly capabilities:
- Stream and record on iOS.
- Connect up to
9cameras or video sources. - Add logos, graphics, text, prerecorded media, and layouts.
- Use built-in multistreaming and Custom RTMP.
- Store and reuse assets in the cloud.
That means a beginner does not need to think of Switcher as a complicated control room. Think of it as a guided production center for live video.
Your First Workflow Walkthrough :
The smartest first workflow is not a huge production. It is a small, repeatable one.
Here is the beginner path I would use.
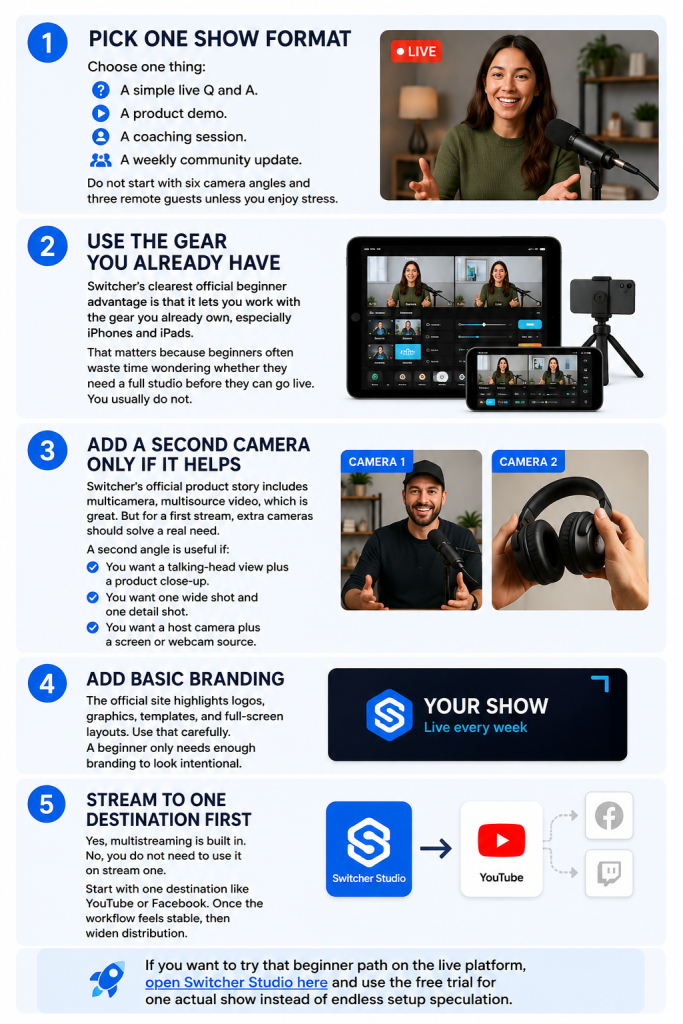
Step 1: Pick One Show Format
Choose one thing:
- A simple live Q and A.
- A product demo.
- A coaching session.
- A weekly community update.
Do not start with six camera angles and three remote guests unless you enjoy stress.
Step 2: Use The Gear You Already Have
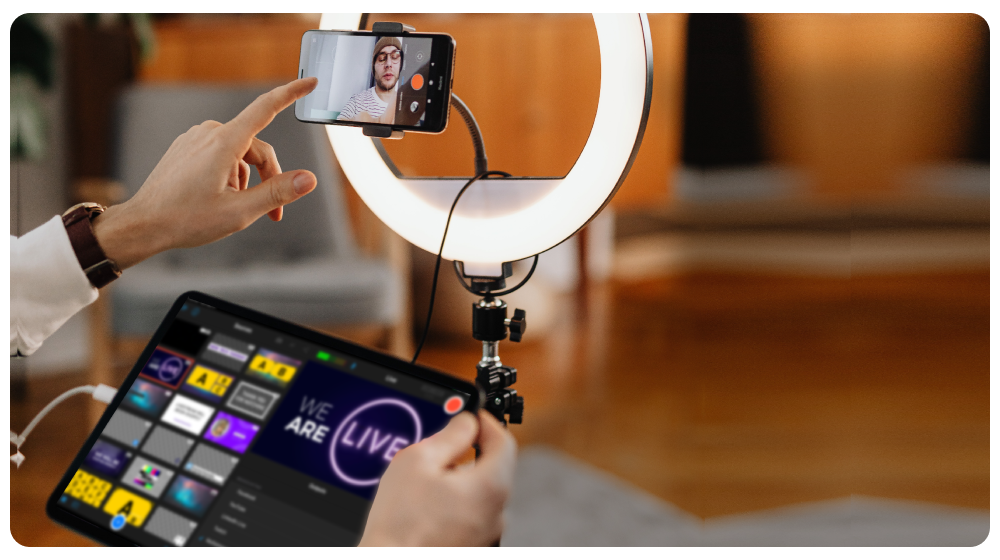
One of Switcher’s clearest official beginner advantages is that it lets you work with the gear you already own, especially iPhones and iPads.
That matters because beginners often waste time wondering whether they need a full studio before they can go live. You usually do not.
Step 3: Add A Second Camera Only If It Helps
Switcher’s official pages includes multicamera, multisource video, which is great. But for a first stream, extra cameras should solve a real need.
A second angle is useful if:
- You want a talking-head view plus a product close-up.
- You want one wide shot and one detail shot.
- You want a host camera plus a screen or webcam source.
Step 4: Add Basic Branding
The official site highlights logos, graphics, templates, and full-screen layouts. Use that carefully. A beginner only needs enough branding to look intentional.
Step 5: Stream To One Destination First
Yes, multistreaming is built in. No, you do not need to use it on stream one.
Start with one destination like YouTube or Facebook. Once the workflow feels stable, then widen distribution.
If you want to try that beginner path on the live platform, open Switcher Studio here and use the free trial for one actual show instead of endless setup speculation.
Best Practices For New Users :
The best Switcher beginners are usually the ones who stay boring at first.
That is a compliment.
Here is what helps most:
- Keep the first production short.
- Use one main camera well before adding more sources.
- Choose one destination before multistreaming everywhere.
- Prepare graphics in advance instead of improvising on air.
- Record every session so you can learn from it later.
The official site also mentions Director Mode, cloud asset storage, clip creation, and repurposing tools. Those are useful, but they are more valuable after the basic live workflow is already comfortable.
Common Beginner Mistakes :
Mistake 1: Building Too Much Before The First Stream
This is the big one.
Beginners often see:
- Multicamera.
- Remote guests.
- Hosting.
- Memberships.
- Shopify integrations.
and try to turn them all on at once.
That is a recipe for confusion.
Mistake 2: Treating Multicamera Like A Requirement
Switcher supports up to 9 cameras or video sources, but that is a capability, not a mandatory starting point.
One clean camera angle beats four chaotic ones every time.
Mistake 3: Ignoring Repurposing
The official site is clear that Switcher is not only for going live. It also supports recording, storage, clips, watch pages, and analytics. Beginners who record every session learn faster and get more value from each stream.
Mistake 4: Choosing Too Many Destinations
Built-in multistreaming is useful. But if you are still learning the flow, multiple destinations can distract you from the quality of the actual show.
Support Resources :
Switcher has a pretty beginner-friendly support footprint from what I reviewed:
- A Help Center.
- FAQs.
- A blog with use-case guidance.
- Release updates.
- Product pages that explain each major workflow area.
That matters because live-video tools are easier to adopt when the support path is visible.
The official materials also repeatedly emphasize that the platform is for creators and teams who want pro-looking output without making video production feel impossible. That tone helps beginners because it keeps the product from sounding like it is only for studio professionals.
That mindset shift is helpful. Beginners usually do better when they treat Switcher as a repeatable workflow tool, not a test of whether they are “technical enough” to stream well.
That confidence boost is part of the beginner experience too, and it helps people keep showing up consistently week after week with less hesitation and less anxiety on camera during live sessions overall online anywhere confidently now too.
When To Expand Beyond The Basics :
Once the first stream is stable, it makes sense to expand.
A reasonable growth order looks like this:
- Add multicamera angles.
- Add multistreaming.
- Invite remote guests.
- Use video hosting and watch pages.
- Explore memberships, one-time purchases, or Shopify-linked monetization.
That order keeps the learning curve manageable.
It also matches the way Switcher is presented officially. The platform starts with making creation and streaming simpler, then stretches into distribution, hosting, and monetization once the user is ready.
If you are ready to make that jump, start with Switcher Studio here and expand one layer at a time instead of trying to become a production company overnight.
Verdict :
Switcher Studio is a strong beginner platform in 2026 because it gives new users a practical path into live video without forcing them to start with a full studio mindset.
Its real beginner advantage is not only the feature list. It is the workflow shape:
- Start with familiar devices.
- Build one clean stream.
- Add more sources later.
- Expand into hosting and monetization only when ready.
If that sounds like the kind of learning curve you want, try Switcher Studio here and use the first trial week to run one real show instead of overthinking the setup.
FAQ :
Is Switcher Studio Good For Beginners?
Yes. The official product pages are built around using familiar devices like iPhones and iPads, plus a free trial path that makes the first workflow easy to test.
Do I Need Professional Cameras To Start?
No. One of Switcher’s strongest official messages is that you can begin with gear you already have, especially iPhones and iPads.
How many cameras can a switcher use?
The official site says you can connect up to 9 Cameras or video sources simultaneously.
Does Switcher Studio Support Multistreaming?
Yes. The official site highlights built-in multistreaming and Custom RTMP for broader destination flexibility.
Is There A Free Trial?
Yes. The official pricing path includes a 14-day free trial.
More on Switcher Studio
Hand-picked guides to help you choose the right tool — no fluff.
 Case StudiesSwitcher Studio Case Study 2026What actually happened when teams rolled it out.
 FeaturesSwitcher Studio Top Features 2026The standout features and whether they justify the price.
 ComparisonsTenable vs Alternatives 2026The strongest competitors compared side by side.
 TutorialsVista Social Beginner's Guide 2026A clean start-here walkthrough with no jargon.